If you’d like to give your kayak a makeover, or someone gifted you an old kayak, and you want to repaint it, you’ve come to the right place! I’ve painted a few for myself and my family, and it’s easy enough for anyone to do, even at home. So, how do you paint a kayak?
Painting a kayak requires six steps:
- Remove Your Additional Kayak Parts
- Clean Your Kayak Thoroughly And Sand It Down
- Paint, Preservation, And Patience
- Apply The Clear Coat For The Finishing Touches
- Rewash It Thoroughly, Applying Wax
- Reassemble The Components Of Your Kayak
You’re free to plunge right into painting your kayak, or if you’re looking for a guide that will explain each detail clearly and with a smile, continue reading below, and I guarantee you won’t be disappointed!
How To Paint A Plastic Kayak
Painting a kayak yourself is more accessible than most people think and only takes a little bit of knowledge, effort, and patience. However, there are a few essential things you’ll need before you can get started, so let’s take review them and get you well on your way.
What Will You Need To Start Painting Your Kayak?
The more thorough you are in painting your kayak, the longer your paint-job will hold up and the more aesthetically pleasing the result. It’s also worth noting that safety should always be your top priority, so be wary of harmful paints and substances. The following are essential to get started:
- A good-quality painting mask
- A couple of clean pieces of cloth
- Dishwashing soap
- Marine-safe Wax or clear finishing spray paint
- Sandpaper
- Acetone
- Marine-safe spray paint or paint that works on plastics
- Water
Once you have fulfilled the list of requirements, it’s time to start with step one of painting a kayak.
Step 1: Remove Your Additional Kayak Parts
Firstly, you will need to spend some time removing the additional accessories and components on your kayak that you do not intend to paint. It will save you time to mask them or cover them up to prevent paint damage. Additionally, you eliminate the risk of replacing something affected by any substances used.
You also run the risk of ruining the aesthetic feel of your kayak with oddly-colored parts that may require you to repaint it. It is also advised to place the pieces you remove into a large container or in a specific location so that you can avoid losing them.
Be mindful to choose an appropriate location for painting your kayak. Both paints and spray paints contain harmful chemicals which can cause the human body considerable damage.
Before beginning the paint job, make sure you have a well-ventilated, dust- and debris-free room and that your kayak lay steadily on a large enough tarp. If you’re painting in a small space, ensure all windows are open, and a ventilation fan provides good airflow; you want to avoid having airborne particles sabotage your efforts.
Step 2: Clean Your Kayak Thoroughly And Sand It Down
In preparation for painting your vessel, you’ll need to sand it down with sandpaper first. When sanding, be sure to smooth up all of the surfaces of the kayak that you wish to paint; this will help the They come in various grit levels for different applications, but a grit of 100 to 220 is ideal for a kayak.
If you’d like, you may also prefer to use an orbital sander. An orbital sander will do a perfect job removing just the right amount of paint while scuffing the kayak flawlessly. It will make sanding your kayak a quick, easy and painless process. Use around 120 grit sandpaper, ensuring that you go over the kayak lightly but quickly.
The Acetone on your list is a solvent, which means it may dissolve or break down things like paint and varnish. It typically exists in nail polish, varnish, and paint removers, and using it on your kayak will guarantee it’s free of oils that hinder the paint from adhering correctly.
Cleaning the kayak with some water and soap or dishwasher liquid is necessary before painting it. Dust particles, built-up grime, and other pollutants that might impair how the paint clings to the surface can quickly come off with a bit of Acetone.
After sanding and cleaning your kayak, you’ll want to apply a good-quality binding primer, such as Rust-oleum. This primer is universal and works well on both metal and plastic, and its unique formula enables the paint to attach itself to the plastic better. Consequently, allowing for a result that will look aesthetically pleasing and last much longer.
Leave the primer to dry for a little while, and ensure that you start applying the base coat within an hour of the primer. Otherwise, you may have problems with the paint bonding to the plastic.
Step 3: Paint, Preservation And Patience
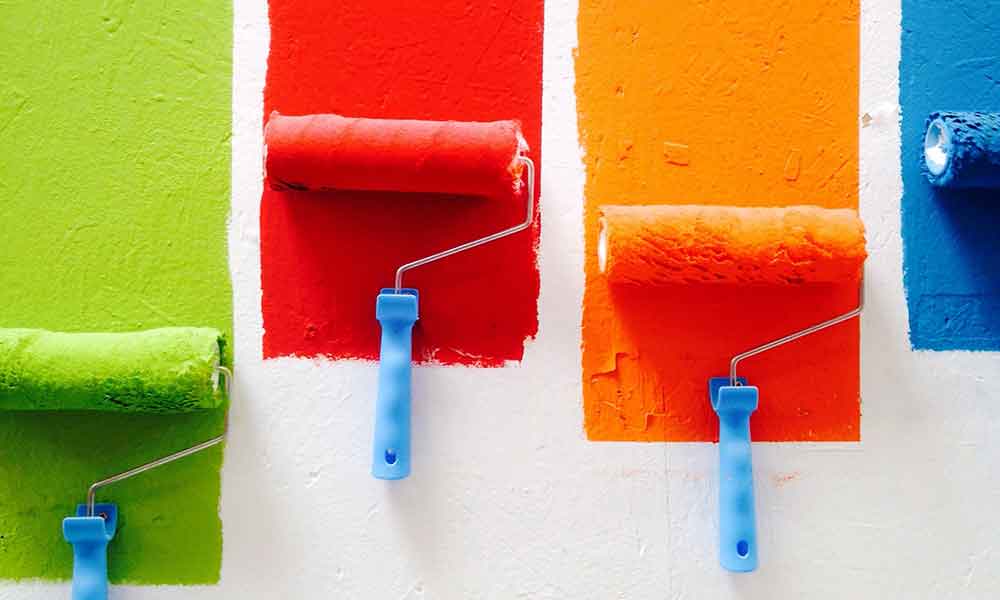
When picking your paint, make sure it’s water-resistant and suited for plastics (or for your specific kayak) since conventional paints may not adhere to plastic. You’ll probably find that two coats of paint will suffice for your kayak.
Before starting painting, please remember to wear your safety mask! When applying more than one spray paint color to your kayak, ensure that you start with the lighter color first. Spray the entire kayak with the lighter color, and afterward, you can go ahead with the darker colors, creating shapes, stickers, and letters how you see fit.
You may always add a third and final coat of clear paint to help protect the color and care into painting the kayak. Additionally, you may paint a wooden, polyethylene, or fiberglass kayak as long as you choose the appropriate paint for the type of vessel.
After you’ve painted the entire kayak, you must give the paint enough time to dry entirely; otherwise, it may leave ugly marks and patches on the kayak, causing you to repaint it. Equally essential, you must apply a clearcoat layer once the paint is applied and settled. Clearcoat will help the color stay on exponentially longer.
If you use your kayak daily, you may want to consider three coats of paint, while weekend warriors would be better suited to two coats. People who kayak casually every other weekend may only prefer a single coat of paint.
It may be tempting to get gloss, high gloss, or matte sprays instead, but do yourself a favor and opt for the flat clear coat for the best results. If you’re someone who uses their kayak for hunting, then know that the paint gloss will create enough shine to scare off any game that may spot you on the water.
Again, the popular opinion is to apply two coats of paint, but the truth is that you’ll be OK with even just one. In essence, consider how often you use your kayak and in what kind of weather conditions – it will give you a good indicator of how many layers will be suitable for your kayak.
Step 4: Apply The Clear Coat For The Finishing Touches
When you have applied all the layers of paint to the entire kayak and it is completely dry, it’s time to apply the clear coat. Again, ensure that you get a flat coat; matt is acceptable, but semi-gloss or gloss becomes a problem if you hunt in your because it will scare off birds, dear, and other game.
Otherwise, the clear coat will ensure that the paint remains fast to the kayak’s plastic.
Step 5: Rewash The Kayak Thoroughly, Applying Wax
Once the paint and clear coat are completely dry, go ahead and give your kayak a last clean with extra dishwashing soap and water to maximize its cleanliness. Once your boat is dry, you may add additional care using marine wax. It’s absolutely optional, but it will offer an extra layer of scratch prevention as well as a lovely gloss.
Step 6: Reassemble The Components Of Your Kayak
After a good amount of cleaning, sanding, painting, and more cleaning, it’s time to reassemble the kayak and replace the pieces you removed at the start. In other words, you may reinstall your seat as well as all of your other screws and components.
Should You Use Spray Paint Or Regular Paint On A Kayak?
Painting your boat using a brush takes longer since it requires more expertise, and your paintbrush cannot cover the same surface area as spraying. However, since kayaks are generally much smaller than buildings or structures, this may not be an issue.
In the same breath, you might discover you have more precision and control over the painting process when using a paintbrush compared to a spray can.
Regardless, if you’re looking to add more of an intricate design to your kayak, brushing might be a more plausible way to go, especially if you want to show off your artistic flair. You can use a brush to create unique patterns or pictures, create splashes of color, among various other things.
Spraying has the disadvantage of using up a lot more paint than brushing since a lot of the contents of the can might wind up in the air, which is known as overspray.
Furthermore, spraying paint may be a messy process, so make sure you’re working in a broad enough area, away from other items, and that you’ve covered all the places you don’t want to have painted. This, of course, includes you (and, in some cases, the dog).
Furthermore, spraying can also be rather messy to apply paint, so you will need to make sure you are in a sizeable, open area, away from other objects, and have covered all the spots you don’t want to have covered in paint. Of course, this also includes you (and, in some cases, the dog).
As previously stated, make sure you’re working in a well-ventilated environment since spray paints can produce a lot of fumes when the paint particles become airborne.
Which Paints Are Suitable For A Kayak?
If you like to do research thoroughly before doing a job, look at these different paints that are suitable for kayaks.
What Is The Best Paint-Type For Plastic?
If you’re going to use ordinary spray paint, you’ll need to prime your object beforehand. It is best to use paints whose formula caters to plastics. Some of the products on the market are Krylon Fusion for Plastic, Valspar Plastic Spray Paint, and Rust-Oleum Specialty Paint For Plastic Spray.
Is Acrylic Paint Viable To Use On Plastic?
Acrylic paint, which is widely accessible, may be used to paint plastic. However, it is best to choose the right paint for your job. Before applying the paint, you may need to prepare and seal the surface, which is usually done by sanding and priming plastic.
What Kind Of Paints Are Suitable For Wooden Kayaks?
Kayak enamel paint is an excellent choice for wooden kayaks due to its urethane-modified resin.
Polyurethane paint (PU paint) is a tough, long-lasting coating for steel, concrete, wood, and other substrates used in industrial and architectural painting systems. A reaction polymer consists of a polyol resin and an isocyanate hardener or curing agent.
A polyurethane coating is essentially a liquid plastic that dries into a paint-like surface on a substrate. The kinds of isocyanates and polyols used to produce polyurethane can change its characteristics, allowing it to tailor to various applications.
Polyurethane paint has a glossy surface and is resistant to chemicals, water, abrasion, and temperature. It also has a long shelf life. As a result, it’s an excellent choice for both fiberglass and wooden boats.
Conclusion
Remember that you need to start by sanding the kayak with 100 to 220 grit sandpaper, and then clean it with Acetone and allow it to dry. Afterward, apply the bonding primer, let it dry for a few minutes, and use the base paint coat. Finally, apply the flat clear coat, rewash it and replace all the kayak pieces that you removed at the start.