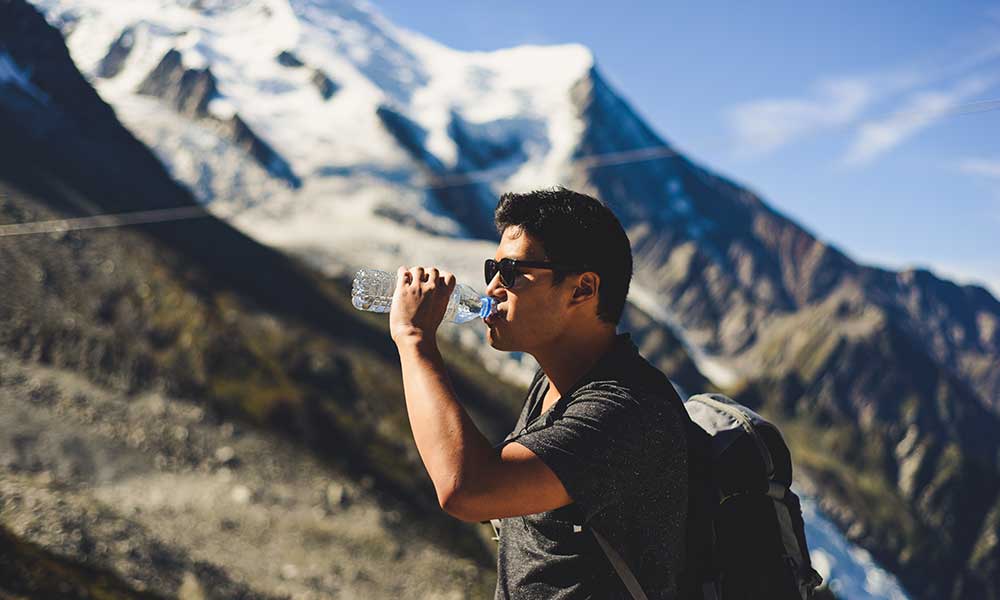
Water and snacks are essential when hiking. If you’re lucky, there might be some water fountains along the trail you can use to fill up your water bottle, meaning that you don’t have to carry all the water with you. However, if this isn’t the case, you need to bring enough water for the entire trip. This begs the question of how to carry all this water while hiking.
There are different methods of carrying water while hiking; each has its pros and cons. Firm water bottles, collapsible water bottles, and water bladders are some options. If you can refill your water on the trail, you might also have to bring equipment to purify the water.
To choose the best way to carry water for your hiking trip, you must consider the terrain and climate when you will be hiking. How much water do you need to bring? Where in your backpack should you pack the water you get? What purification options are available for water you fill-up along the trail? This article gives a step-by-step guide for carrying water while hiking.
How Should You Carry Water While Hiking?
From choosing the right type of water bottle to finding the best place to store your water, there are many things to consider concerning carrying water while hiking. Experienced hikers have their selected methods down to a T, but this might be an overwhelming task for novice hikers. Fear not, though, as we have dedicated this article to help you discover how to carry water while hiking.
Step 1: Choosing The Right Water Bottle
There are different kinds of water bottles to choose from when hiking. The three biggest contenders are firm water bottles, collapsible water bottles, and water bladders or hydration packs.
Firm water bottles include plastic and steel water bottles. These are good for carrying water while hiking as they stand up on their own. Typically, you can get a firm water bottle between one and three liters in size. It is recommended that you drink at least two cups of water per hour hiking. Therefore, a three-liter water bottle should be sufficient for a six-hour hike.
The disadvantage of firm water bottles is that they tend to be heavier and take up a lot of space. The bottle remains the same size, no matter how much or how little water it contains.
Collapsible water bottles shrink down as the water it contains becomes less. This makes these bottles a great option when you have limited space. However, collapsible water bottles usually are only between one and two liters big, allowing for four hours of hiking time. In addition, they cannot stand up on their own if they’re not entirely full. They are also not as durable as firm water bottles.
Water bladders are probably the most common option for carrying water while hiking, and with good reason. Water bladders can take up to four liters of water, sufficient for an eight-hour hike, and take little space in a backpack. In addition, most modern backpacks have a sleeve specifically designed to keep a water bladder. This also makes it easier to pack and organize a backpack for hiking.
Water bladders are an excellent option for hiking because they allow you to drink while hiking without stopping and taking out your water bottle. However, should you need to refill the water bladder, you must unpack most of your backpack to get it. Water bladders are also not as easy to clean as firm water bottles or collapsible water bottles.
The type of water bottle you choose ultimately depends on personal preference and how much water you need for the hiking trip. Experimenting with a few different water bottles will give you a good idea of which setup you prefer.
Step 2: Where To Pack Water For Hiking
Where to pack your water for hiking is another common problem new hikers face. While you could use any backpack for a day hike, experts recommend investing in a proper hiking daypack. These backpacks are more structured, making your hike more comfortable. In addition, they are usually structured to make your water more accessible.
If you have chosen to use a water bladder to carry your water while hiking, a daypack should have a sleeve and opening for your water bladder’s hose. This will allow you to fit everything into your backpack and access your water easily.
If you have chosen a firm or collapsible water bottle to carry water while hiking, you have one of two options. You can either carry the water in the backpack’s main compartment, or you can carry the water in the mesh pockets outside of the backpack.
If the water bottles fit into the mesh outer pockets, it would be best to carry them there. Doing so will enable you to access your water while hiking easily. In addition, you won’t need to take off your backpack and open it to get to your water. This will make it easier to stay hydrated while hiking.
However, if you’re hiking in freezing weather or are exposed to direct sun for the entire hike, placing your water inside the main compartment is advised. This is because your water can freeze if carried outside in cold weather. Also, if the water is exposed to the sun, it will get hot and be unpleasant to drink.
Again, experimenting with different places to carry water is best as it allows you to get a feel of what you prefer. For example, some people find that carrying water in the mesh outer pockets attributes to uneven weight distribution, making the backpack heavier. Instead, they suggest placing the water in the middle of the main compartment of your backpack.
Step 3: Purifying Water While Hiking
If you have access to water along the hiking trail, you don’t have to carry all the water you need for the trip with you. This is great, as it saves you space and makes your backpack lighter. However, you must then also bring a device to purify the water you collect along the trail.
Unless the water comes from a tap that is confirmed to be safe for drinking, it is always purify any water you intend to drink. Even if there is no pollution or visible contaminants in the water, there might still be bacteria present that your body isn’t used to, which can make you seriously ill.
There are various options for purifying water. Boiling water isn’t practical for a day hike when you have limited time and space. Therefore, water purification tablets, ultraviolet light filters, and pump water filters are the best options for purifying the water while hiking.
All these methods safely purify water and are lightweight and easy to pack. However, note that purification tablets and ultraviolet water purifiers don’t remove dirt or floating debris from drinking water. If this bothers you, a pump water filter is the better choice.
If you have a water bladder, you can use one of the above-mentioned water purification methods or use a sip water purifier. These can attach to the mouthpiece of your water bladder and are a quick option for purifying water. However, sip water purifiers don’t kill viruses that may be present in the water.
You can also use a gravity water filter if you have some time. However, these filters take some time to use, and you must have sufficient space to pack the equipment.
Conclusion
There are various things to consider when carrying water for hiking. Start by choosing the type of water bottle you want to use, such as a firm water bottle, a collapsible water bottle, or a water bladder. Then, decide where you want to carry the water, either inside the backpack’s main compartment or in the outer mesh pockets. If you can refill your water on the trail, you must also pack a device to purify the water with. Again, experimenting with different bottles and methods is the best way to discover what works for you.

