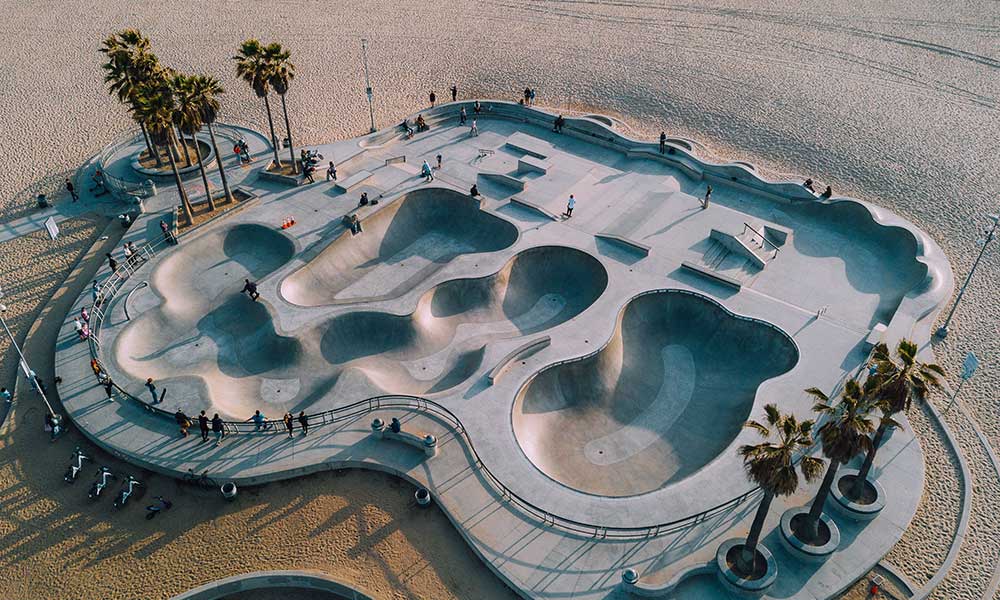
A quarter pipe or “quarterpipe” is a skateboard ramp with a smooth curve and a metal lip (known as the “coping”). It can be used to perform a variety of tricks and is an essential part of any skatepark.
What’s the Difference Between a Halfpipe and a Quarter Pipe?
A quarter pipe is basically half of a half pipe. If you put two quarter pipes together at the lowest point, you’ll create a half pipe, allowing the skater to transition from one quarter pipe to the other, gaining momentum, catching air, and performing tricks.
Both quarter pipes and half pipes resemble the concave designs of a swimming pool. Old-school skaters would often jump backyard fences to skate in empty swimming pools, swiftly moving from slope to slope.
Can I Make My Own Quarter Pipe?
Yes, you can. Whether you should or not is entirely up to you.
If you don’t have any DIY skills, always make a mess of home improvement projects, and don’t know your way around a drill or a 2×4, you may be better off buying this must-have ramp.
If you have the tools, skills, and time, and you want to save yourself a few bucks, you can build your own skateboard ramp.
How to Make Your Own Quarter Pipe Ramp
The first step to making your own quarter pipe ramp is to buy the right equipment.
You can find most of what you need in your local hardware store, including
- One 2×8 8 feet in length.
- Two 4×8, 3/4″ sheets of plywood
- Two 4×8, 3/8 sheets of plywood
- Two 4×8′, 1/4″ sheets of Masonite
- Two 4′ pieces of lumber
- Three 2×6’s 94.5 inches long
- Eight 2×4’s 94.5 inches long
- Twelve 2×6 pieces 4 feet in length
- A metal pipe of 8′ x 1.5″
- A metal sheet of 6″ x 8′
- Lots of screws!
You’re also going to need a tape measure and pencil to measure and mark; a jigsaw to cut, a piece of string and a nail, and a drill with drill bits.
Once you have gathered all of the essentials, it’s time to move on to the next step.
Step One: Prepare the Board
Draw a line down the middle of the 4×8 3/4″ sheet of plywood, being sure to measure exactly in the middle so that you have 4 feet of length on either side.
Measure 6.5 feet horizontally from one edge of the line that you just created to beyond the plywood sheet, taking you away from the sheet and onto your work surface.
Mark the spot.
Step Two: Mark and Measure
Hammer a nail slightly (not all the way) into the spot that you just marked. Attach a piece of string to the nail and secure it to a pencil on the other end, making sure the string is 6.5 feet once the pencil is attached.
Pull the string taut from the nail and use the pencil to draw a sweeping arc on the plywood, going from one edge to the other.
Step Three: Cut the Board
Using a jigsaw, cut along the line that you just drew and then cut down the previous line in the center.
You should have two matching pieces of plywood.
Step Four: Build the Transition
The next step is to connect the 2×4’s to each of the curved pieces that you cut above, creating the transition. These should be positioned every 10 inches or so along the transition and can be screwed into the plywood pieces.
Measure beforehand to make sure that the pieces are evenly spaced and the final one is flush with the top of the transition.
When the 2×4’s are connected and the transition is standing, place three 2×6’s on the back, spacing them evenly for maximum support.
Step Five: Add the Coping
Drill a total of 4 holes into one side of the 8-foot metal pipe using an 8 mm drill bit, being sure not to drill directly through.
Drill 4 holes into the other side of the pipe with a 4 mm drill bit.
Drill 4 screws through the large and small holes in the pipe.
Step Six: Add the Surface
Curve the 2 4×8 plywood sheets to cover the front of the quarter pipe and the 2×4’s that you installed earlier.
For additional durability, consider cutting some extra sheets of plywood and adding them to the first layer.
Step Seven: Add the Masonite and Metal Sheet
Add the sheets of Masonite onto the first and second layer of plywood.
If you have the metal sheet, install it on the bottom of the quarter pipe, creating a smoother transition from the ground and on to the pipe. It’s not essential, but it makes a big difference.
Step Eight: Create the Platform
The final step is to create the platform at the back of the skate ramp.
- Add one of the 2×6 4′ boards to the back of the ramp, placing one at the top and bottom on either side. Connect each top and bottom section with another 2×6 board.
- Connect the top of the two new sections with the 2×8 piece.
- Attach two 4′ pieces of lumber to the 2×8 piece, screwing them in at the top.
- Mark lines across the top bar of this new platform, creating lines at 1-foot increments.
- Attach 7 of the 4′ 2×6 boards along the lines you just created, connecting them to the back of the ramp to create a roof and provide the support.
- Finish the roof of the platform with another 4×8 sheet of plywood, add some extra lumber to support the bottom, and you’re all done!
How Much Does it Cost to Make a Quarter Pipe?
The cost will depend on the materials used. Opting for high-quality materials could set you back $200 to $300. That may sound like a lot, and you may even find a cheap pre-built quarter pipe for less, but the one you make for $300 is not the same as the one you buy for $300.
The former should last longer and ride better. It will withstand the grinding and the tricks. If you treat it properly, it should last for many years. The same can’t be said for a cheap quarter pipe that you buy.
Should I Buy or Build a Quarter Pipe Ramp?
You can find all the equipment you need to build a quarter pipe skateboard ramp in your local home improvement store. Add a few simple tools to the mix, and you can build a long-last ramp capable of rivaling anything in your local skate park.
But that’s assuming you know what you’re doing. If not, all of those materials (and your time) could be wasted.
If you don’t have the funds for a new quarter pipe and aren’t confident in your DIY skills, consider buying one used.
You can usually find some very cheap quarter pipes and half pipes on eBay, Facebook marketplace, and Craigslist. If a family has just sent their skating-mad kid off to college, and there’s a skate ramp taking up space in the backyard, they will be desperate to get rid of it.