Imagine that it’s your first time in yoga class and you catch yourself feeling totally frustrated with every pose as you gaze around the room for some guidance. You want to go with the flow like everyone else, but you are not familiar with the yoga poses and have absolutely no idea what is going on.
This is the experience most first-time yoga practitioners have after rolling out their brand-new mat for a yoga session. While there is bound to be some confusion during your first yoga session, there are ways you can prepare yourself so that you’re not entirely lost.
Familiarizing yourself with some of the poses you might see in your yoga classes beforehand will not only put your nerves at ease, but will also help you get the most out of your first class.
In this article, we’ll go into detail about 12 key yoga poses for beginners.
1. Mountain Pose (Tadasana)
Tadasana, which is the Sanskrit name for mountain pose, is a basic standing pose that is often done in preparation for other standing poses, but it’s also a lovely pose to practice on its own to improve your posture. Mountain pose is great for increasing body awareness, building strength in your legs, and promotes proper alignment. Although it looks like a simple pose, but maintaining proper posture and alignment during this active standing pose isn’t as easy as it sounds. The key to getting the most out of mountain pose is to be aware of every part of your body as you stack your bones and keep the spine elongated.
How to do the Mountain Pose:
- Stand up straight with your toes touching and heels slightly apart.
- Spread your toes apart and energetically distribute your weight through each part of both feet. Engage your core muscles.
- Relax your shoulder blades, gently rolling them back and down.
- Inhale while reaching your arms overhead and pressing down into the balls of your feet.
- Keep the chest open and hands at your sides.
- Do this pose in the mirror to observe your posture.
2. Tree Pose (Vrksasana)
Vrkasana, also known as tree pose, is another standing pose that is awesome for working on those balancing skills. This yoga pose is also great for firing up the core muscles, strengthening the muscles in the lower body and aligning the spine. This pose engages the whole body and can help you improve your posture.
How to do the Tree Pose:
- Begin by standing up straight at the top of your yoga mat.
- Join your palms together at prayer position and either keep them in front of your chest or lift them up above your head.
- Take a deep breath and find a balance on your right leg (standing leg). Bend the left knee out to the left side, pressing the bottom of the left foot into the right inner thigh.
- After holding this pose for at least 30 seconds, switch legs and repeat the same posture.
3. Cat-Cow Pose (Marjaryasana/Bitilasana)
If you are attending a yoga class for your first time, chances are you will be guided to do a few rounds of cat-cow pose. This pose typically takes place at the beginning of a yoga session to awaken the spine as it gently stretches all the muscles in your back. Cat-cow pose is great for preparing the spine for the rest of the poses you will be doing throughout your yoga workout, while also soothing any back pain.
How to do the Cat-Cow Pose:
- Start on your mat in a seated position. Then come onto all fours, stacking your shoulders directly above the hands and keeping your knees stacked directly below your hips.
- Make sure that you are distributing weight evenly between both hands, spreading your fingers out wide.
- On the inhale, round your back arching it up as you tuck your chin into your chest. Feel the wonderful stretch all the way from neck to tailbone, mimicking a cat-like posture.
- On the exhale, gently bring your back all the way back down until you create an “arch” in your spine as you lift the head up and tilt it back.
Since this pose opens up the spine and increases your range of motion, its best to repeat this pose at least 5 times.
4. Child’s Pose (Balasana)
Balasana—or child’s pose—is a friendly favorite of yoga practitioners everywhere. It’s a pose that you can always come back to at any time during your yoga practice when the more advanced poses become too heated. One of the most healing yoga poses to exist, child’s pose invigorates the connection between the breath and the body, opens up the hips, and fills the body with a calm, serene energy. When we come into this beloved yoga staple, we become grounded. It gives us a second to simply be with yourself and your breath.
How to do Child’s Pose:
- Begin in a neutral position on all fours.
- Take a deep breath in and send the hips back, bending the knees as you lower your butt down to rest on your heels.
- Send your chest down toward the floor above your knees.
- Your shoulders and head should be lowered to the floor.
- You have the option to send your arms out in front of you or backward along your sides with palms face down. For extra cushion under your head, you may fold your arms under your forehead.
- Breathe and rest in this asana for as long as you wish.
This pose is an amazing hip opener and offers a lovely stretch on the low back.
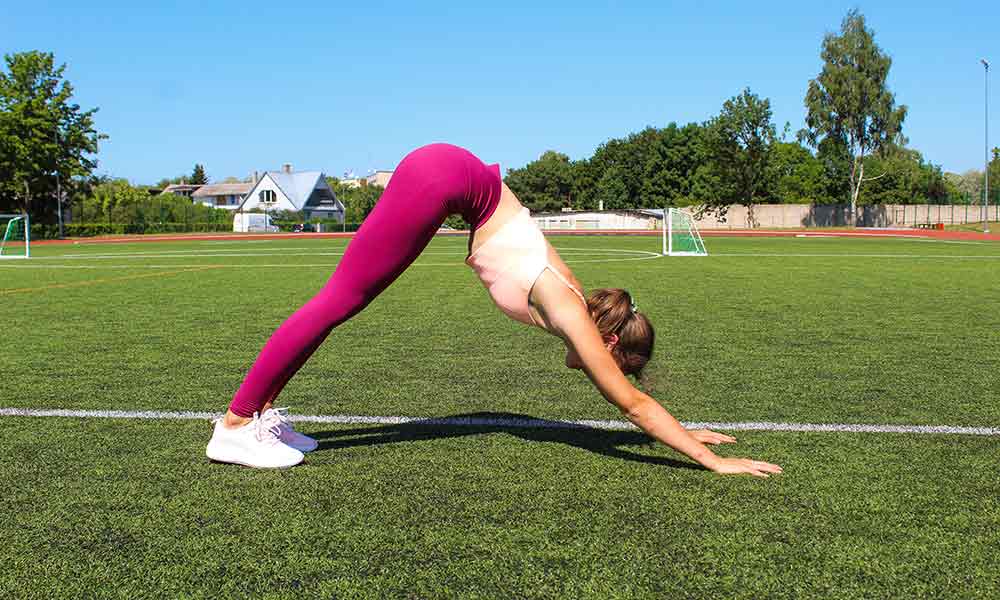
5. Downward-Facing Dog (Adho Mukha Svanasana)
Downward-facing dog is another yoga staple. Anyone who has ever done yoga is familiar with downward-facing dog. This pose helps to calm our nervous system while also improving our flexibility, temporary relieving pressure from the spine, and opening up the shoulder blades.
Like child’s pose, downward-facing dog is always there for us when we need a quick break from all the advanced poses.
How to do Downward-Facing Dog:
- Press both palms into the mat in front of you, just a little above the shoulders.
- Place your knees on the ground, stacked directly under the hips.
- Take a deep breath in, and on the exhale, send your knees up off the ground, lifting your butt and hips toward the sky.
- Try to press your heels to the ground to stretch out the calf muscles.
- Make sure that your head is in between your upper arms and in line with them. Resist the urge to just let your head hang.
- Do not allow your lower back to round. If you need to bend your knees slightly, you may do so.
6. Plank Pose (Phalakasana)
The plank—called kumbhakasana in yoga—is a common full body exercise that is oftentimes dreaded in the gym. In yoga, however, we love a sweaty plank pose that allows us to flow strong but gracefully through our vinyasas and chaturangas. This yoga pose is great for building strength in the core muscles, upper body, and legs.
How to do a Plank Pose::
- Begin on all fours with your knees stacked directly below your hips and your hands flat on the floor stacked directly beneath your shoulders.
- Lift your knees up off the floor and extend your legs out behind you.
- Your entire body should look like one long, firm line.
- The palms of your hands should be pressed firmly into the ground, shoulder-width apart and your shoulders should be directly above the wrists.
- Keep your spine and neck elongated while engaging your core, gazing down at your mat.
To transition into a low plank from a plank pose, slowly lower down by bending your elbows, making sure that they are hugged tightly against the side of your body, forming a 90-degree angle. In a low plank, you should be hovering over the ground.
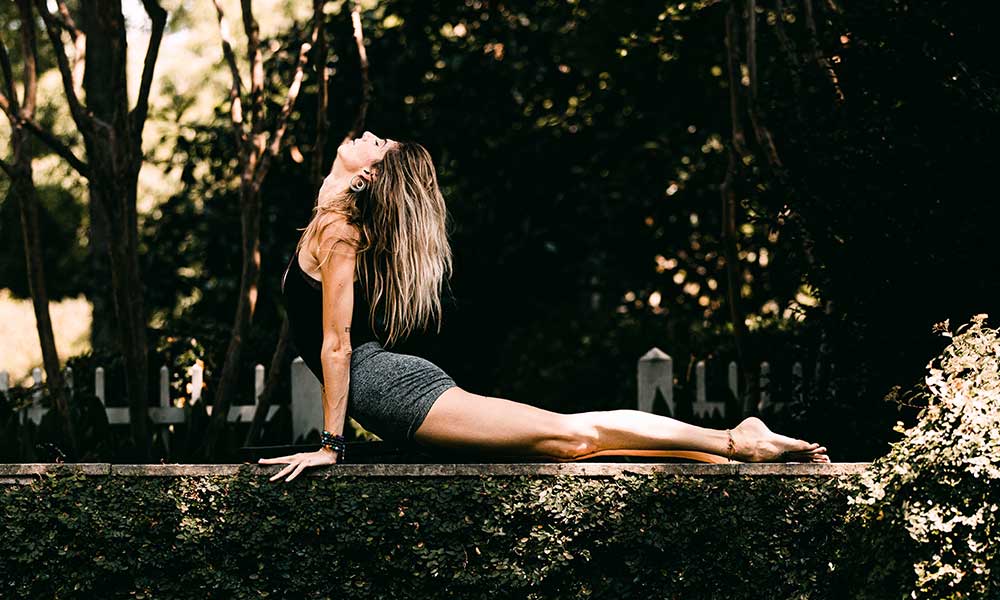
7. Upward-Facing Dog (Urdah Mukha Svanasana)
Just like we have a downward-facing dog, we also have an upward-facing dog in yoga. You’ll see upward-facing dog a lot if you attend Vinyasa style yoga classes, since it’s a popular yoga pose that is usually seen in sequence with plank, low plank and downward-facing dog.
How to do the Upward-Facing Dog Pose:
- You will most likely be in low plank before beginning this pose.
- From low plank, sink your hips down to the floor and rest the tops of your feet on the mat.
- Engage your core muscles and straighten your arms, pushing your chest up. Keeping your palms planted on the floor, pull your shoulders back, engage the shoulder blades and tilt your head up, opening up the chest.
Upward-facing dog is beneficial at relieving tension in the lower back muscles and giving the spine a nice stretch. This pose is also considered a “heart opening posture” since it require you to keep an open chest.
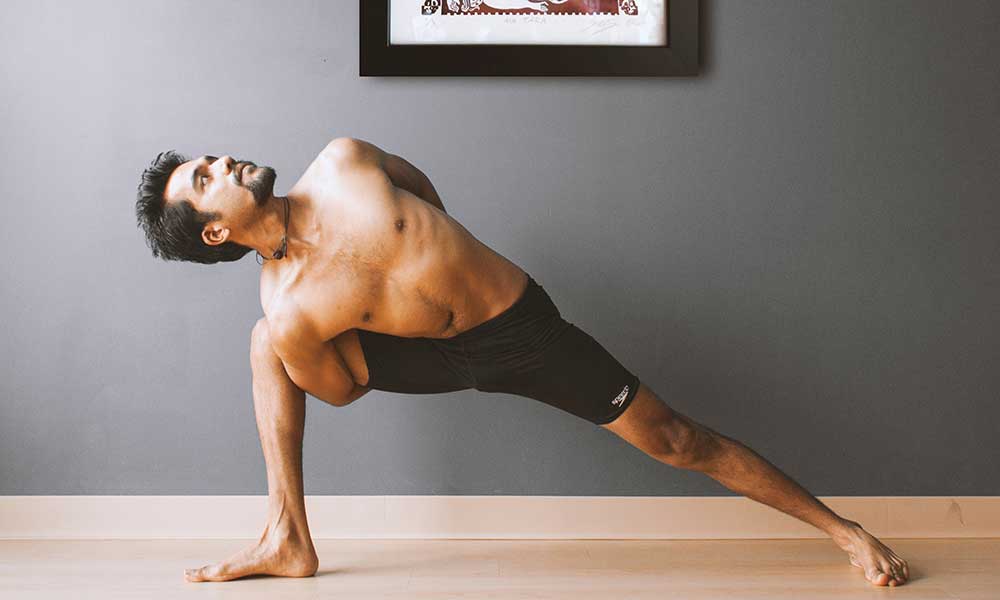
8. Triangle Pose (Trikonasana)
Trikonasana, also known as triangle pose, is a standing pose that’s got a lot to offer. This pose strengthens your stability, stretches and lengthens the spine, opens up the hips and shoulders, and even stimulates your organs! This yoga pose activates your core muscles which helps you achieve balance, leaving you feeling grounded and emotionally stable. Triangle pose—named after the triangle shape our bodies make during the pose—is also effective at relieving pain and tension in the lower back as well.
In a lot of yoga classes, you’ll get to this pose from Warrior II position (see below). However, today we are going to show you how to get there from mountain pose (tadasana) since it is a more elaborate transition.
How to do the Triangle Pose:
- Starting in the mountain pose, you’ll want to adjust your feet so that they are just a smidge wider than shoulder-width apart. Arms should extend so that they are parallel to the ground, palms facing down. This is a pose that requires you to do it on the right and left side, so if you are starting on the right side, make sure that your right foot is at a 90-degree angle with the ground while your left foot is at a 45-degree angle.
- Inhale deeply and on the exhale, hinge at the hips, extending your body to the side over your right leg. Stay elongated at the sides of your waist, do not allow yourself to get bunched up.
- Reach your right arm down toward the right foot and gently grab your ankle with your right hand. Extend your left arm up to the ceiling, creating a straight line with your arms and shoulders stacked.
- Turn your head up toward the ceiling.
- Hold the pose for a few rounds of breath and then repeat on the other side.
9. Bridge Pose (Setu Bandha Sarvangasana)
If you’re new to yoga, Setu Bandha Sarvangasana, otherwise known as bridge pose, will probably be the first back-bending pose that you’ll learn. Bridge pose engages the entire body, awakening muscles in the body that we may not be accustomed to using. A heart-opening posture, bridge pose stretches out the muscles in the chest, back and neck while firing up our hamstrings, glutes, back, thighs and ankles. Bridge pose is an excellent posture to add to your routine if you spend a lot of time sitting throughout the day as it can counteract the effects of slouching and kyphosis (abnormal curvature of the spine).
How to do the Bridge Pose:
- You will begin on your back in the center of your mat with your knees bent. Legs and feet should be parallel and hip-width apart.
- Once you have positioned yourself, start to scoot your feet closer to your butt. Pressing down firmly through the bottoms of both feet, inhale to lift your hips up from the pelvis.
- Close your hands together and bring them underneath your back on the floor.
- Your shoulders should be pressed firmly into the ground with your chest open wide.
- Hold the pose for a few breaths and on an exhale, unclasp your hands and begin to lower your body back down to the floor.
After doing this pose, try lying flat on your back in a neutral position and bask in the openness of your chest and back.
10. Warrior II (Virabhadrasana II)
Virabhadrasana II, also called Warrior II, gets its name after a ferocious incarnation of the Hindu god Shiva. This pose lives up to its name by testing the strength and endurance of both newbie and seasoned yogis alike. A very common yoga pose, Warrior II is sure to get your leg muscles burning, especially after a few long rounds of breathing. A yoga teacher once said that Warrior II exists to teach us that we are capable of breathing through even the most painful situations, surrendering to the discomfort one moment at a time.
There are three poses dedicated to Virabhadra: Warrior I, Warrior II, and Warrior III. Since Warrior II tends to pop up more often in yoga sequences than its two counterparts, we’ll go into detail on how to do a proper Warrior II.
Be warned: If you stay in this pose long enough, your legs will begin to feel shaky. You will be tempted to come out of the pose and rest your legs. You’ll want to bring your arms down to your sides and rest your shoulders. But if you manage to see it through, you’ll have found true strength like that of a warrior.
How to do the Warrior II Pose:
- Stand longways on your mat with your arms stretched out to the sides, keeping your feet parallel to one another in a wide stance.
- If you are beginning on the right side, turn your right foot so that your right foot and knee are facing the front of the mat.
- Your left foot should be slightly turned toward your right foot, but your right heel should be in line with your left inner arch.
- Bend your right knee so that it is stacked directly above your ankle.
- Activate your left thigh by energetically pressing it back as you allow your tailbone to pull down toward the mat.
- Keep your head stacked right above your pelvis and your shoulders right above your hips.
- Activate the muscles in your arms by reaching strongly though each arm, gazing over your right fingertips.
- Try to hold this pose for at least 5 breaths, or for however long your yoga teacher instructs.
- To come out of the pose, push down through both feet, exhale, and then on the inhale straighten out your legs and return to a neutral standing position.
- Repeat the pose on the left side.
11. Extended Side Angle (Utthita Parsvakonasana)
Extended side angle, called utthita parsvakonasana in Sanskrit, is another full-body stretch and strengthening combo that packs a lot of punch. You’ll often see this pose as part of a Vinyasa flow sequence. Extended side angle is a well-rounded yoga posture that helps you improve your balance, breathing, and range of motion in the side body.
This pose is great for strengthening and stretching the legs, hips, and hamstrings. It’s also a lovely chest and shoulder opener that can relieve tension in your back and shoulders.
How to do the Extended Side Angle Pose:
- Begin in mountain pose, standing longways on the mat. Take a deep breath in here.
- On the exhale, step your left foot back, leaving your front foot parked in place.
- Stretch your arms out to make a horizontal line from both sides, palms facing down.
- Position your right heel so that it is toward the center of your mat at a 90-degree angle in relation to the ankle.
- Bend the right knee, forming a right angle with your calf and thigh that is parallel to the floor.
- Allow your right forearm to rest on top of the right thigh with your palm facing up towards the ceiling. Sometimes, yoga practitioner will do variations of this pose by placing the right fingertips to the floor for added length or even coming into a bind by wrapping their right arm underneath their leg and clasping it with the left arm. No matter what you do, stay strong in the core to avoid dumping all your weight onto the right thigh.
- Raise the left arm up and extend it over the ear, sending your energy out through the fingertips, keeping your chest open and your left shoulder stacked above your right shoulder.
- Gaze up at your left hand.
- Repeat on the left side.
12. Corpse Pose (Savasana)
There is nothing quite like a restful savasana, or corpse pose, to blissfully end a productive yoga workout. If you have never heard of savasana before, you are in for a yoga treat. This yoga postures calls for you to lay down on your back on your yoga mat and simply relax. While it may sound simple, many yogis believe that corpse pose is the most challenging of all the yoga poses you will ever try. This is because there are many students who can bend, twist and “Warrior II” their way through an entire yoga class yet struggle to simply lay down on the floor.
Most yoga teachers will design their sequence with this in mind, saving savasana for the very end. By reserving corpse pose as the final resting posture, it is viewed as a much-deserved treat.
How to do the Corpse Pose:
- Lie all the way down on your back with your legs extended out wide, taking up as much space as you want to.
- Rest your head, but keep it centered. Do not let it fall to either side.
- Extend your arms out to the sides, taking up as much space as you would like to.
- Gently focus on your breathing as you quietly observe the natural rhythm of your breath entering and exiting your lungs.
- Stay in this pose for several minutes as you turn your attention inward, and allow your yoga practice to sink in.
This is the simplest version of the pose, but there are a lot of variations of corpse pose that are also fun to try. Some yoga studios offer props such as blocks and blankets. Using a blanket under your head gives you extra cushion and support. If you would like support in the low back, you can try placing a block beneath the arch of your back. In this final resting pose, don’t forget to relax and breathe.